GRCHub allows users to efficiently manage IT assets by adding applications, servers, cloud storage, and other infrastructure components into the IT Catalog. Users can add these assets in three different ways: Manual Entry, Bulk Import, and Synchronization.
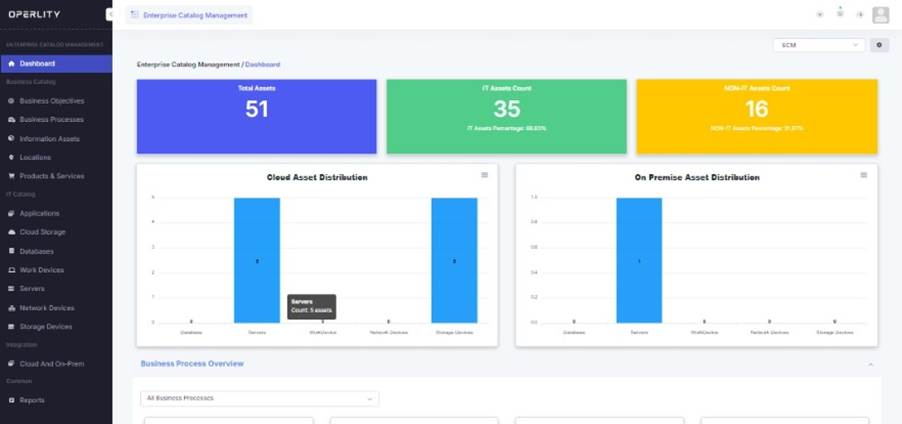
1. Navigating to the IT Catalog
- Log in to the Enterprise Catalog Management Module.
- From the left-hand menu, select the IT asset category you want to add, such as:
- Applications
- Cloud Storage
- Databases
- Work Devices
- Servers
- Network Devices
- Storage Devices
2. Adding IT Assets Manually
To manually add an IT asset, follow these steps:
- Select the asset type from the IT Catalog menu (e.g., Applications).
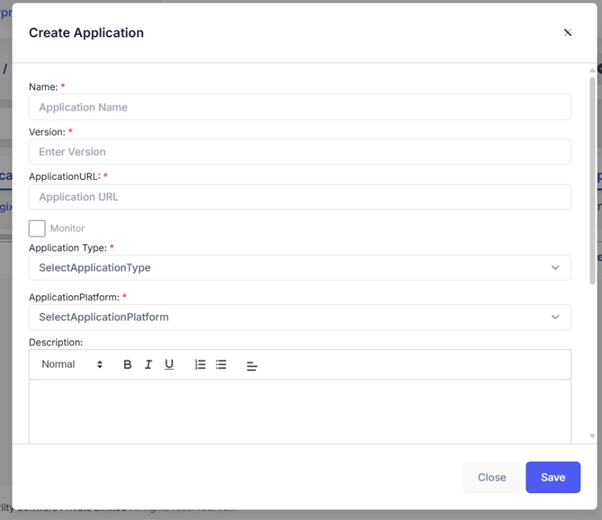
- Click on "Add Application" at the top-right corner.
- A form will open (as shown in the screenshot). Fill in the required fields:
- Application Name – Enter the name of the application (e.g., "Salesforce CRM").
- Version – Specify the version number.
- Application URL – Provide the URL where the application is hosted.
- Application Type – Choose from available types (e.g., Web, Mobile, Desktop).
- Application Platform – Select the platform (e.g., Windows, Linux, Cloud).
- Monitor – Enable monitoring if needed.
- Description – Add additional details about the application.
- Click "Save", and the application will be added to the catalog.
Example
If an organization wants to add their HR software, they can enter:
- Name: Workday HR
- Version: 2025.1
- URL: hr.company.com
- Type: Web Application
- Platform: Cloud (AWS)
- Description: HR system for managing employees and payroll.
3. Bulk Importing IT Assets
For organizations dealing with multiple IT assets, Bulk Import simplifies the process.
- Click on "Upload Application" at the top-right.
- A pop-up window will appear.
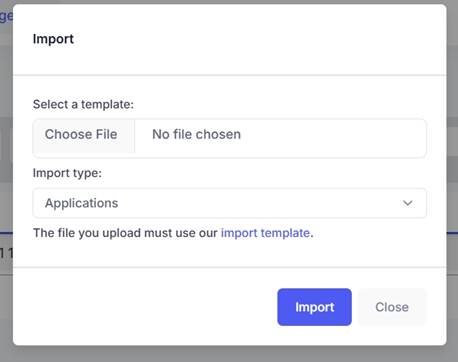
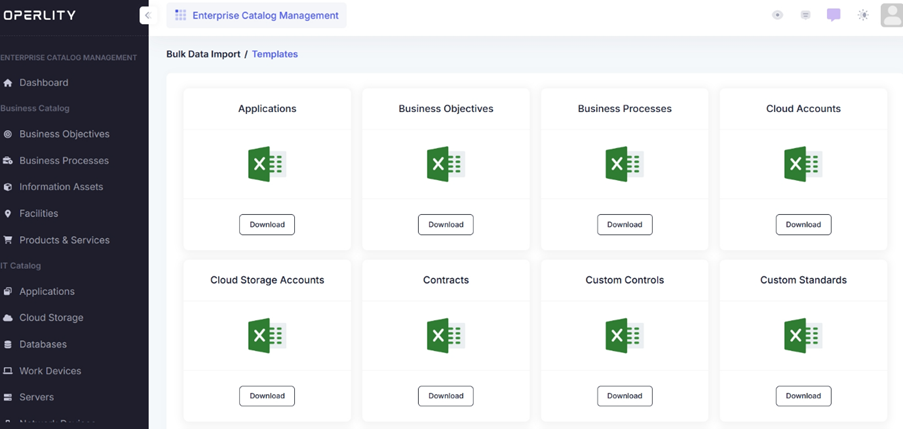
- Click "Import Template" and download the appropriate Excel file.
- Fill in the asset details in the template:
- Application ID
- Name
- Description
- Version
- Priority
- URL
- Type
- Platform
- Location
- Owner
- Re-upload the filled template and click "Import".
- All assets from the file will be automatically added to the system.
4. Synchronizing IT Assets Using Infrastructure Sync
To integrate cloud or on-prem infrastructure into GRCHub, follow these steps:
- Click "Infrastructure Sync" from the left-hand menu.
- The Infrastructure Sync Dashboard will display connected cloud/on-prem resources.
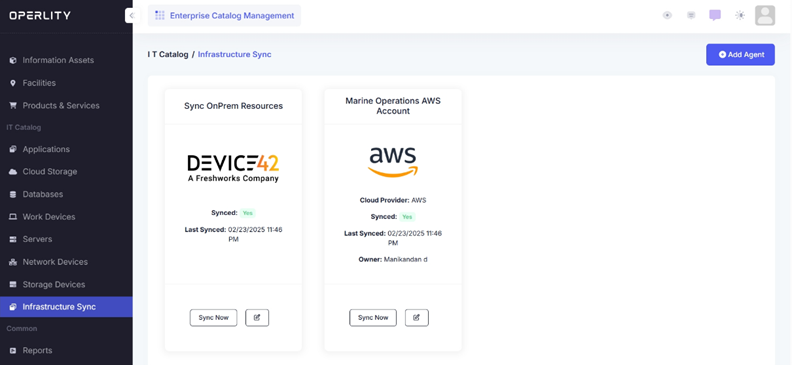
- Click "Add Agent" to integrate a new cloud provider.
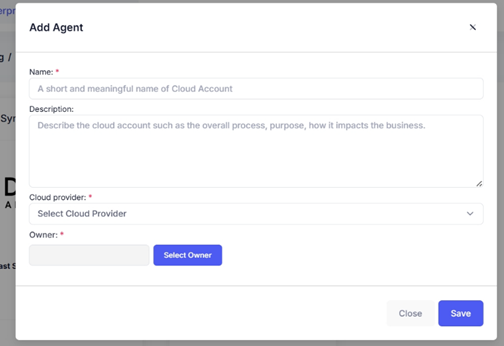
- A form will open (refer to the screenshot), where you need to:
- Enter a Name for the connection.
- Provide a Description of the cloud account.
- Select a Cloud Provider (e.g., AWS, Azure, Google Cloud).
- Assign an Owner responsible for managing the integration.
- Click "Save" to create the connection.
- Once saved, go back to the Infrastructure Sync page and click "Sync Now".
- All linked infrastructure assets will be automatically added to GRCHub.
Example
A company wants to sync its AWS cloud infrastructure into GRCHub:
- Name: AWS Cloud Sync
- Cloud Provider: AWS
- Owner: IT Admin
- Description: Synchronizes EC2 instances, S3 storage, and RDS databases.
Once saved and synced, all AWS infrastructure will be visible within GRCHub.
Managing IT assets efficiently is crucial for compliance, security, and operational management. With GRCHub’s manual entry, bulk import, and synchronization options, organizations can ensure their IT Catalog remains comprehensive, up-to-date, and automated.
Was this article helpful?
That’s Great!
Thank you for your feedback
Sorry! We couldn't be helpful
Thank you for your feedback
Feedback sent
We appreciate your effort and will try to fix the article